ESP32 Arduino Core Quick Start
The following instructions should work for any development board or module that can run the ESP32 Arduino Core library. If your project uses the Arduino Core library the steps below illustrate how to modify your firmware so your devices connect to Deploy the Fleet for updates.
Before You Start
Before continuing, create a product in Deploy the Fleet.
You will also need to follow the ESP32 Arduino Core instructions for installing the library if you haven’t already done so.
Finally, install the Deploy the Fleet Arduino library. It can be found in the Library Manager as DTF_ESP32Update.
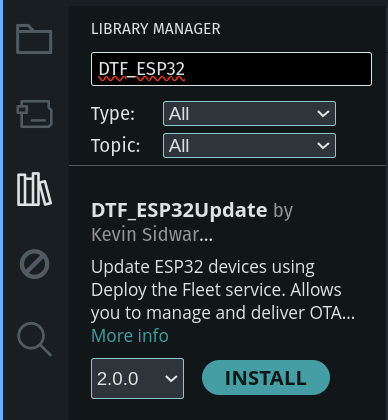
LIBRARY VERSION: Be sure to install a 2.x version of the library. The Deploy the Fleet Arduino library has many versions for legacy support but all versions prior to 2.0.0 are deprecated.</a>
What are you trying to do?
- I already have a project and want to integrate Deploy the Fleet
- I want to use an example project to test-drive Deploy the Fleet
Existing Project
If you have an existing project and need to integrate Deploy the Fleet please refer to the official docs. Integration should only take a few minutes.
If you are starting from scratch, the next section provides an example project to get you going.
Example Project
This section will walk you through setting up the example project provided by the Deploy the Fleet Arduino library. It is a simple sketch that attempts to get an update from Deploy the Fleet on startup.
- Launch the Arduino IDE
- From the Tools->Board->ESP32 menu select the appropriate board for your hardware.
- From the File->Examples-DTF_ESP32Update menu select UpdateInLoop
- Uncomment and provide a value for WIFI SSID.
- Uncomment and provide a value for WIFI PASSWORD.
- Uncomment and provide a value for DTF_PRODUCT ID with your Deploy the Fleet product ID. This can be found on the Settings page of your project in the Management Console.
- Provide a value for CURRENT_VERSION with the version string you want your firmware to report.
- Compile the project by clicking the Verify button or using the Ctrl-R keyboard shortcut.
- Connect your hardware.
- Upload the firmware by clicking the Upload button or using the Ctrl-U keyboard shortcut.
- Open the Serial Monitor and set the baud rate to 115200
The sample project is a very simple firmware that repeatedly outputs the current version over serial and will attempt to get an update from Deploy the Fleet a single time on boot. If you haven’t uploaded a firmware to Deploy the Fleet yet, it will simply tell you there are no updates available.
Export Firmware From Arduino IDE
Before you can upload your firmware to Deploy the Fleet you need to export it from the Arduino IDE.
- Compile the project by clicking the Verify button or using the Ctrl-R keyboard shortcut.
- Export the firmware binary using the menu Sketch->Export compiled Binary or using the Ctrl-Alt-S keyboard shortcut.
Your firmware binary will be exported to the same folder where your sketch is located and will be in a build folder. You need to upload the .bin file.
OTA PARTITION SIZE: Make sure your configured OTA partition size is sufficient for the size of your exported firmware binary. This can be configured via the Tools->Partition Scheme menu in the Arduino IDE.
WARNING: Deploy the Fleet can not validate that your firmware binary will fit in your device’s OTA partition. You should validate this prior to uploading the firmware. The Arduino Core library will fail and skip any update that is too large to fit in the OTA partition.
Upload Firmware to Deploy the Fleet
- Open the Deploy the Fleet Management Console.
- Navigate to the Deployments page for your product.
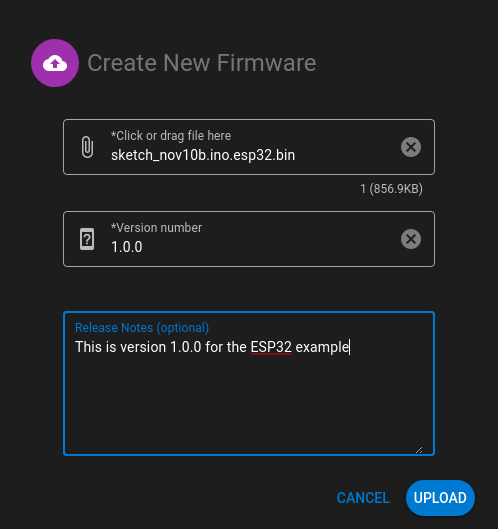
- Click Create a new deployment.
- Provide a name and description.
- Attach the firmware binary you built above. The version should automatically populate.
-
Click Deploy now.
Your First Update
Now that everything in your firmware is configured let’s create an update.
- If you are using the Arduino example, modify the value of the CURRENT_VERSION variable. If you are integrating into your own project, update the firmware version using your preferred method. Alternatively, you can specify a
custom_versionattribute on thedtf_ota_cfg_tstruct. - Compile the project by running
idf.py build. - Open the Deploy the Fleet Management Console.
- Navigate to the Deployments page for your product.
- Click Create a new deployment.
- Provide a name and description.
- Attach the firmware binary you built above. The version should automatically populate and now indicate 2.0.0.
- Click Deploy now.
- Reset your device
Your device should update and start outputting the new message indicating it is running version 2.0.0.